Import data#
Import the road graph: edges and markers#
The road graph tables roads, edges, nodes and markers can be filled from two vector layers:
one for the edges and one for the markers.
These layers must follow the structure of the template files provided with the plugin,
in the folder roadnetwork/resources/import/ of the plugin:
source_edges.fgbfor the edges,source_markers.fgbfor the markers.
You can open these FlatGeobuf files in QGIS to see example data.
Edges layer#
Each feature is an edge, i.e. a portion of a road between two nodes, drawn in the direction of the road.
- Geometry: LineString, or MultiLineString with only one part (only the first part of a multi-part geometry is imported).
- Columns:
| Column | Type | Description |
|---|---|---|
road_code |
text | Code of the road, e.g. D248. The roads are created from the distinct values. |
edge_order |
integer | Order of the edge in its road, from the start of the road: 1, 2, 3, etc. |
road_type |
text | road or roundabout |
road_class |
text | Class of the road. It must exist in the table glossary_road_class, e.g. Départementale |
road_class_code |
text | Code of the road class, e.g. the code of the French department |
is_active |
boolean | If the road is active |
road_topic |
text | Optional topic of the road, e.g. Port. Can be empty. |
is_access_road |
boolean | If the road is an access road |
id_source |
text | Identifier of the feature in the source data. Can be empty. |
The previous and next edges of each edge are calculated from the edge_order column.
Markers layer#
Each feature is a marker (reference point, PR) positioned along a road.
- Geometry: Point, or MultiPoint with only one point.
- Columns:
| Column | Type | Description |
|---|---|---|
road_code |
text | Code of the road of the marker. It must correspond to a road_code of the edges layer. |
code |
integer | Code of the marker, e.g. 12 for PR 12. Must be positive. |
abscissa |
real | Abscissa of the marker, in meters. Must be positive. Use 0 for the real markers. |
is_virtual |
boolean | True for a virtual marker, False for a real marker. |
id_source |
text | Identifier of the feature in the source data. Can be empty. |
A marker 0 with an abscissa 0 is automatically created at the start of each road, if it does not already exist.
Run the import#
Use the Processing algorithm Import data from template, also available with the button Import data
of the RoadNetwork administration panel:
PostgreSQL connection to the database: the database where the plugin structure has been installed,Edges: the edges layer,Markers: the markers layer.
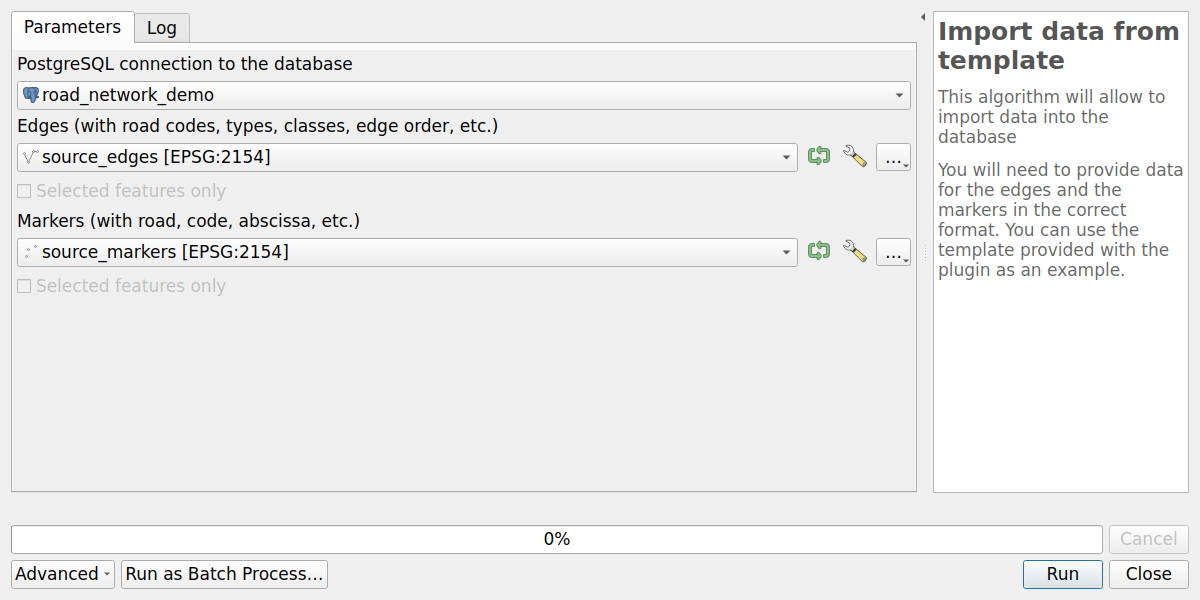
The algorithm:
- checks that the layers contain the required columns,
- copies the layers in temporary tables, reprojected to the coordinate reference system of the database,
- runs the database function
road_graph.import_data_from_template_tables, which:- checks the values of
road_typeandroad_class, - creates the roads, the nodes at the start and end of each edge, the edges and the markers,
- calculates the references of the edges (start and end markers, abscissas and cumulative distances),
- checks the values of
- displays the number of imported roads, edges, nodes and markers, and drops the temporary tables.
Note
This import is designed to initialize an empty road graph. Existing objects are not updated: conflicting data are ignored.
Create a demo database#
The template files provided with the plugin contain a complete demo road graph, in Normandy (France),
in the coordinate reference system EPSG:2154 - RGF93 v1 / Lambert-93:
- 2,260 roads: departmental and national roads, highways, roundabouts, etc.,
- 7,809 edges,
- 13,774 markers.
It is useful to train the users or to test the features of the plugin without modifying the production data.
Since the plugin schema is always road_graph, a database contains only one road graph:
use a dedicated PostgreSQL database for the demo, for example road_network_demo,
with the PostGIS extension.
- In QGIS, add a connection to this database, and configure the plugin with it.
- Run the algorithm Create database structure,
with the default coordinate reference system
EPSG:2154. - Open the template files
source_edges.fgbandsource_markers.fgbin QGIS. They are stored in the plugin folder: use the menuSettings / User Profiles / Open Active Profile Folder, then open the folderpython/plugins/roadnetwork/resources/import/. - Run the algorithm
Import data from templatewith these two layers, as described above. - Run the algorithm Create database local interface to create the QGIS administration project of the demo database, and open it.
To add some demo business data, follow the examples of the page Managed objects.
Business data#
To import your business data (road signs, safety barriers, etc.) and calculate their references, see Managed objects: add a business table.